Microgreens have become quite the rage lately and for good reason. They are easy to grow in your own kitchen, are exceptionally nutritious, and easy to add to salads, soups and sandwiches. Plus, you can grow them in the deep midwinter inside your home and enjoy a tasty and healthy harvest well before our outdoor growing season begins.
According to Penn State Extension, microgreens are harvested for eating after the first true leaf emerges. The first leaf-like structure (or structures) which emerge from a seedling are called cotyledons. The cotyledons are followed by the first true leaf and that is the point when you want to harvest. You’ve no doubt observed this while starting your garden seeds inside or with seed you have direct sown outside, but you let those plants grow to maturity and fruiting.
Microgreens can be as much as 40 times more nutritious than the fully grown plant.
Arugula microgreens have nearly 46 grams of vitamin C, while the adult counterpart has 15 mg, for example.
There is also a difference between microgreens and sprouts, which are also grown inside for early harvest. If you’ve ever grown sprouts, you know they are not grown in soil and are ready for harvest in about one week. Microgreens are grown in a potting mix – preferably a soilless mix – and are ready for harvest in about two weeks.
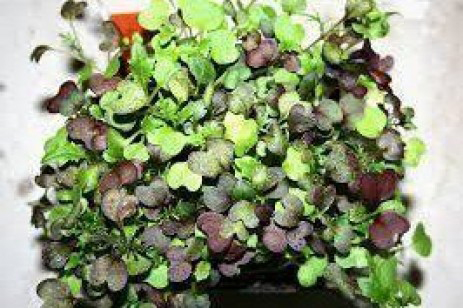
Many seed catalogs now have microgreens seeds and microgreens seed mixes to choose from, but you can grow microgreens from just about any seed. Some plants, however, are more suitable (and tasty) choices for microgreens. Radishes, arugula, red beets, red radishes, cilantro, basil, green peas, popcorn, red cabbage or mustard green seeds are all recommended. Melons, squash and pumpkins – not so much.
To grow microgreens at home you will need a shallow tray with drainage holes filled with soilless seed starting mix. You can use potting soil, but a soilless mix is advised. Water the mix so that it is damp but not soggy.
Penn State Extension, as well as seed catalogs, recommend sprinkling a generous amount of seed closely together over the seed starting mix. Microgreens need to be seeded heavily to make the most efficient use of space. Remember they will be harvested at a very early stage of growth. Water lightly.
In my research, I found that some sources recommended lightly covering the seed with starting mix, while others said not to cover the seed with growing medium. Penn State says that microgreens will germinate unevenly if covered with growing mix.
Once seeds start to grow, place them under bright light for six to eight hours a day. Grow lights or fluorescent lights are great to use if you have them. To water your microgreens, place a tray underneath the tray of seeds and fill it with about an inch of water. Let the microgreens seed tray sit for a few minutes to absorb water from the bottom. Do this every two days or so, or when the soil feels dry.
Watering microgreens from the top can lead to mold development – something you need to be on the lookout for. If the greens develop mold, discard.
Harvest microgreens with clean scissors – do not pull them out of the growing medium. Cut off the greens and a portion of the stem and use immediately or store in the fridge in a glass container.
Enjoy your microgreens in salads, sandwiches and soups and remember to clean out your growing tray before starting your next round of seed.